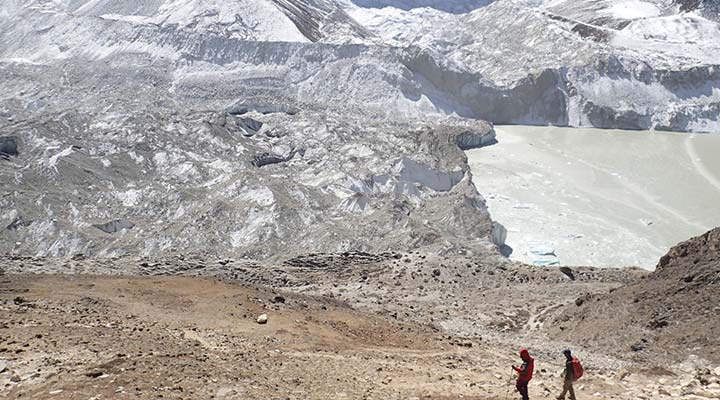
ISLAND PEAK/IMJA TSE - 6,189 M
Island Peak is one of the most popular trekking peaks in Nepal. Named by English Mountaineer in 1953, Eric Shipton, because it appears as an island in a sea of ice when viewed from Dingboche.
OVERVIEW
Island Peak is one of the most popular trekking peaks in Nepal. Named by English Mountaineer in 1953, Eric Shipton, because it appears as an island in a sea of ice when viewed from Dingboche. The peak then regains its local name, Imja Tse in 1983. With little technical aspects, Imja Tse is known as the easiest 6,000m peak in Himalaya. Can be climbed by beginner climber with competitive endurance. The time spans to scale the peak is 16 days round trip from Kathmandu. The trek starts from Lukla. It is the same trek to Everest Base Camp until Dingboche where it turns eastward to Chukkung Valley and up to the base camp of Imja Tse. In fact, people often done it along with Everest Base Camp trek. Though categorized easy, it demands beginner climber’s good endurance to climb from base camp to summit. Passing through rocky paths and scramble to the snowline, crossing crevasse with ladders and climb 300m headwall with fixed line. Imja Tse is still a popular training peak for those that want to attempt Everest, since Sir Edmund Hillary and Tenzing Norgay use it in 1953 and up until today. Imja Tse welcome hundreds of group each year attempting to scale its peak.
ITINERARY
- DAY 1
- Fly to Kathmandu Arriving in Kathmandu. Transfer to hotel.
- DAY 2
- Kathmandu Gear check in the morning and if necessary, you can go shopping in Thamel to complete your gear list. Sightseeing in Kathmandu and after that final packing.
- DAY 3
- Kathmandu-Lukla-Phakding Fly to Lukla and then start trekking for 3 hours to Phakding (2,640m). We will walk at the side of Dudh Koshi River with a view of Mount Kusum Kangguru (6,367m). On the way, we can see porters with a very heavy load. Each porter sometimes could carry even heavier than his own weight. There’s also an animal carrier like Yak or Zopkio, the endemic animal of Himalaya region. Zopkio is a mix between Yak and cow, they usually used at lower part of this mountains (below 4,000m). We will be passing a lot of ‘Mani Stone’ along the way. It’s a pile of stone that have writings on it. It is a prayer meant to bring good luck and safety along the way. Stay in lodge.
- DAY 4
- Phakding-Namche Bazaar We continue our journey to Namche Bazaar (3,440m) for about 6-7 hours. On halfway to Namche, we will enter Sagarmatha National Park signed by a gate and office which we need to register. Before Namche, we will cross the famous Edmund Hillary bridge which is long and very high above the river. After that, the trek will go uphill quite steep and elevation gain of 600 m. Namche was a place where Nepalese people and Tibetan people meet and do some trading. We can still see it now but only in some particular day. Besides that, there’s a lot of store here in Namche. From grocery and merchandise store to outdoors equipment store, book store, money changer, and even bakery and bar.
- DAY 5
- Acclimatization day For acclimatization, we will go uphill to Shyangboche (3,720m) with a magnificent view of the Himalayan Range and also a complete view of Namche Bazaar. Then, we will go further up to Everest View Hotel at 3,800m. Stay there for a while to acclimatize before going back to Namche.
- DAY 6
- Namche Bazaar-Tyangboche Today we continue to Tengboche/Tyangboche (3,860m). Going down until Tesing (3,380m), crossing Dudh Koshi again to Phunki Tenga (3,250m). Here, we’ll rest while having some lunch before another demanding uphill route. Tengboche located on the top of the ridge. The elevation difference from Phunki Tenga is 500 m. The route will be steep and dusty. We can see the famous temple of Tengboche and if we got permission or the temple is open for public, we can get inside. Stay overnight here.
- DAY 7
- Tyangboche-Dingboche We will be trekking above 4,000 m from today. 5 hours walk to Dingboche (4,260m). After Tengboche, we will be passing a nice and cool Rhododendron forest. This is the last tree we can see along the trek. On the way, we will pass Pangboche. Usually people who will climb Everest or another mountain in the area will stop here for a ceremony and get blessing from the monk. After that, continue to Dingboche through Shomare, Orsho, and Samso Ogma. We will have lunch at one of those villages. Dingboche is quite a big village with a nice facility like Internet shop.
- DAY 8
- Acclimatization day Acclimatization day. We will climb to another ridge with heights of 4,70 m called Chubejung Kharka. There’s a Gompa there called Nangkhartsang, usually used for meditation by many monks from Tengboche. If the weather is good, we can see Mount Makalu (8,463m) from that point.
- DAY 9
- Dingboche-Chukkung From Dingboche, we will go up again to Chukkung (4,730m), the last village before Island Peak Base Camp. Trekking for 3-4 hours from Dingboche to Chukkung. Stay overnight at Chukkung.
- DAY 10
- Chukkung-Island Peak Base Camp Walk to Island Peak Base Camp (4,970m) for 5-6 hours. On Base Camp, we can train ascending and descending on a rope for Summit day. Stay overnight in Base Camp using tent.
- DAY 11
- Training day at Island Peak Base Camp Today we train for Summit day while also acclimatizing. Ascending and descending on a rope. This technique will be use for climbing to the summit of Island Peak. After that you can rest and prepare for tomorrow.
- DAY 12
- Island Peak Base Camp-Summit It’s a challenging 9-12 hours climb to the summit and back. The route includes circuitous rocky paths and scrambles to the snow line, followed by a section moving in rope teams across glaciated and crevassed terrain and then a 300m headwall to the summit ridge. After reaching the top, exquisite view of Lhotse Shar, Makalu, Baruntse and Ama Damblam can be seen.
- DAY 13
- Island Peak Base Camp-Dingboche Go back to Dingboche. Stay overnight there.
- DAY 14
- Dingboche-Namche Bazaar Go back to Namche Bazaar. Stay overnight there.
- DAY 15
- Namche Bazaar-Lukla Go back to Lukla. It’s quite a long trek back to Lukla from Namche. Estimation time is about 5-6 hours. Stay overnight in Lukla.
- DAY 16
- Lukla-Kathmandu Fly back to Kathmandu in the morning.
- DAY 17 - 18
- Spare days. Or if we are on schedule, you have free time for a tour in Kathmandu or just relax.
- DAY 19
- Fly back home
INCLUDE
- Airport transfer Kathmandu
- Nepal Visa
- Three nights hotel (twin share) in Kathmandu
- Full meals in Kathmandu
- Flight Kathmandu-Lukla round trip
- Sagarmatha National Park Permit
- Trekker’s Information Management System (TIMS)
- Climbing Permit dan Garbage deposit
- Pasang Lhamu Village Development Committee Permit
- Indonesia Expeditions guide
- Climbing Sherpa dan porter
- Nepali Staff Insurance
- Lodge for the whole program
- Full meals on trekking and climbing
- Tent, rope, and all group equipment
- Sleeping bag & Down Jacket
EXCLUDE
- Flight to Kathmandu round trip
- Personal natural expense: Telephone, wifi, hot shower, laundry, etc
- Personal climbing equipment
- Personal travel insurance
- Gratuities
PREPARATION
Summit day is a challenging 9-12 hours climb and back to base camp. Can be longer, depends on weather and your physical condition. Island Peak categorized easy because of little technical aspects it requires, but not set aside the good physical condition of the climbers. It needs good stamina or endurance. Training should focus on cardiovascular capability. you can do running two to three times a week for 45 minutes to an hour per session. Running on a route that have elevation gain will be a lot better, or use treadmill if there’s no such terrain in your hometown. You can change one of your running sessions in a week with cycling or swimming and especially you need to do also stair climbing with at least 10kg pack. It will be a good cross training. Besides that, muscle training is advisable. Strengthen your upper and lower body muscle, as well core muscle. You can do it at the gym or do your own set of push-ups, sit-ups, pull-ups, plank, etc. In addition, go weekend hiking regularly. It can be started with 8 km round trip hike with roughly 6kg pack, ascending and descending 600m, in less than 2.5 hours. The aim is to ascend 900m carrying an average pack of 10 kg in 3 hours. To reach it, try to increase the difficulty of your training in some way, either by adding weight to your pack (no more than 10 percent per week) or by completing the hike in a shorter amount of time. The capability to acclimatized are different for each person. So, building up your fitness even more will not be a waste. Just make sure you don’t injure yourself by overtraining and always have enough rest. Train 6 month before will increase the rate of success. But if you don’t have that much time, train at least 3 months before.
GEAR LIST
| No | Name | Amt |
|---|---|---|
| 1 | Trekking boots | 1 pair |
| 2 | Double boots | 1 pair |
| 3 | Crampons | 1 pair |
| 4 | Gaiters | 1 pair |
| 5 | Trekking Pole | 1 pair |
| 6 | Ice Axe | 1 |
| 7 | Climbing helmet | 1 |
| 8 | Climbing Harness | 1 |
| 9 | 1.5 meters of 7mm prusik/Accessory cord | 2 |
| 10 | Locking carabiners | 3 |
| 11 | Non-locking carabiners | 2 |
| 12 | Ascender | 1 |
| 13 | Booties (optional) | 1 pair |
| 14 | Wool or Synthetic socks | 3 pair |
| 15 | Liner socks | 2 pair |
| 16 | Midweight Baselayer Top (amount based on preferences) | 3 |
| 17 | Midweight Baselayer Bottom (amount based on preferences) | 2 |
| 18 | Trekking/Soft Shell pants | 2 |
| 19 | Soft Shell Jacket/puffy | 1 |
| 20 | Hard Shell Jacket w/ hood | 1 |
| 21 | Hard Shell pants | 1 |
| 22 | Insulated jacket/down jacket | 1 |
| 23 | Insulated synthetic pants | 1 |
| 24 | Baseball cap | 1 |
| 25 | Beanie | 1 |
| 26 | Buff (amount based on preferences) | 2 |
| 27 | Glacier glasses | 1 |
| 28 | Ski Goggles | 1 |
| 29 | Lightweight synthetic liner gloves | 1 pair |
| 30 | Mediumweight gloves/Ski Gloves | 1 pair |
| 31 | Insulated Mittens | 1 pair |
| 32 | 30L Backpack | 1 |
| 33 | Sleeping bag at least -20°C | 1 |
| 34 | Self-Inflating mattress | 1 |
| 35 | Headlamp with spare batteries | 1 |
| 36 | Sunscreen, SPF 40 or better | 1 |
| 37 | Lip screen, SPF 30 | 1 |
| 38 | 1 Litre water bottle or water bladder | 2 |
| 39 | 1 Litre thermos | 1 |
| 40 | Pee bottle (optional) | 1 |
| 41 | Toiletry bag | 1 |
| 42 | Large Duffel Bag | 1 |
| 43 | First aid kit and special medications (if any) | 1 |


